To photograph headlight restorations accurately, use the same camera position, lighting, and settings before and after, with the lens clean and dry in both photos. Get permission before publishing, remove identifying details, and describe only what the pictures actually show.
For a restoration business, a repeatable routine matters more than dramatic photography. The goal is to document the work clearly, not manufacture a bigger transformation or promise future bookings.
1. Match the camera position and framing
Choose a position you can reproduce after the service. A tripod helps, but a simple note about camera height, distance, and angle can work too. Keep the vehicle parked in the same orientation whenever possible.
Use the same phone, camera lens, zoom setting, and image orientation. Take one straight-on photo of the vehicle's front and a closer photo of each headlight. Include the complete lens edge so viewers can compare the same area rather than different crops.
Check sharpness before starting work. A blurry before photo is not a fair comparison with a sharp after photo.
2. Keep lighting and camera settings consistent
Choose even light that shows the lens surface without strong glare. Open shade can be a practical starting point. Avoid comparing a harsh, sunlit before photo with an after photo taken under completely different conditions.
Tap the headlight to set focus and check brightness. On iPhone, Apple's camera instructions explain how to adjust exposure and hold the focus area until AE/AF Lock appears. Check settings again for the after photo rather than assuming they stayed locked during the job.
Keep headlights off for the main surface comparison. If sunlight or weather changes substantially, disclose that difference instead of presenting the pair as identical conditions.
3. Photograph a dry lens, not a temporary wet look
Remove ordinary surface dirt before documenting the starting condition, then let the lens dry. Photograph the finished headlight dry as well, following any applicable product handling instructions.
Do not spray water, apply oil, or add a temporary dressing just to improve the after image. A wet surface is not a fair substitute for a dry finished result. If you record a wet process stage for education, label it as a process image, not the final outcome.
Use similar cleanliness standards for both shots. Comparing a mud-covered headlight with a washed one mixes cleaning and restoration into the same visual claim.
4. Edit for presentation, not a different result
Crop consistently, straighten the frame, and add clear before-and-after labels. Keep original files so you can refer back to the unedited record.
Do not retouch away scratches, cracks, remaining haze, or other damage. Avoid selective sharpening, whitening, filters, or AI enhancement that changes the apparent condition of the lens.
The FTC's truth-in-advertising guidance says advertising must be truthful and not misleading. Apply that principle to the visual impression, not just the caption. A dramatic image should not suggest every vehicle will achieve the same result.
5. Get consent and protect customer privacy
Ask for written permission before publishing customer vehicle photos. Explain whether you want to use them on your website, social accounts, or paid advertising. Make permission optional and keep the approval with the photo record.
Frame out or securely redact license plates, visible VINs, faces, paperwork, house numbers, and distinctive home details. Check reflections in the lens, paint, and windows too. Review the exported image at full size to confirm identifiers are actually unreadable, and remove location metadata before sharing.
6. Write useful alt text and service descriptions
W3C's informative-image guidance recommends text alternatives that convey an image's meaning. Describe the relevant visible condition rather than filling alt text with city names and sales phrases.
For example, only when accurate: Passenger-side headlight before restoration, showing yellow haze across the outer lens. Give the after photo its own description. Label examples as examples until they match a real image.
In captions, identify the service performed and any visible limitations. Exterior restoration does not repair bulbs, LED modules, wiring, aim, seals, housings, cracks, water ingress, or internal defects. Appearance photos alone do not demonstrate measured nighttime performance.
7. Use a quick publication checklist
- Same vehicle, same headlight, matched angle and framing.
- Comparable lighting, sharp focus, and dry lenses.
- No damage removed or results exaggerated through editing.
- Publication permission recorded and private details removed.
- Accurate labels, alt text, service description, and limitations.
8. Show genuine work and invite an assessment
Use your own authorized job photos, not another shop's results. The genuine 2003 Porsche 911 pair below comes from Brian's work at Headlight Boost. It is a real-job record, not a controlled lighting test or a promise of identical outcomes. Explore our restoration gallery and restoration and marketing guides for more context.
For a Denver Metro assessment, text Brian at (720) 720-4910 with clear headlight photos, or request a quote. Headlight restoration starts at $99 for both headlights; your quote is confirmed based on lens condition and location.
2003 Porsche 911 headlight restoration: Real Headlight Boost Photos
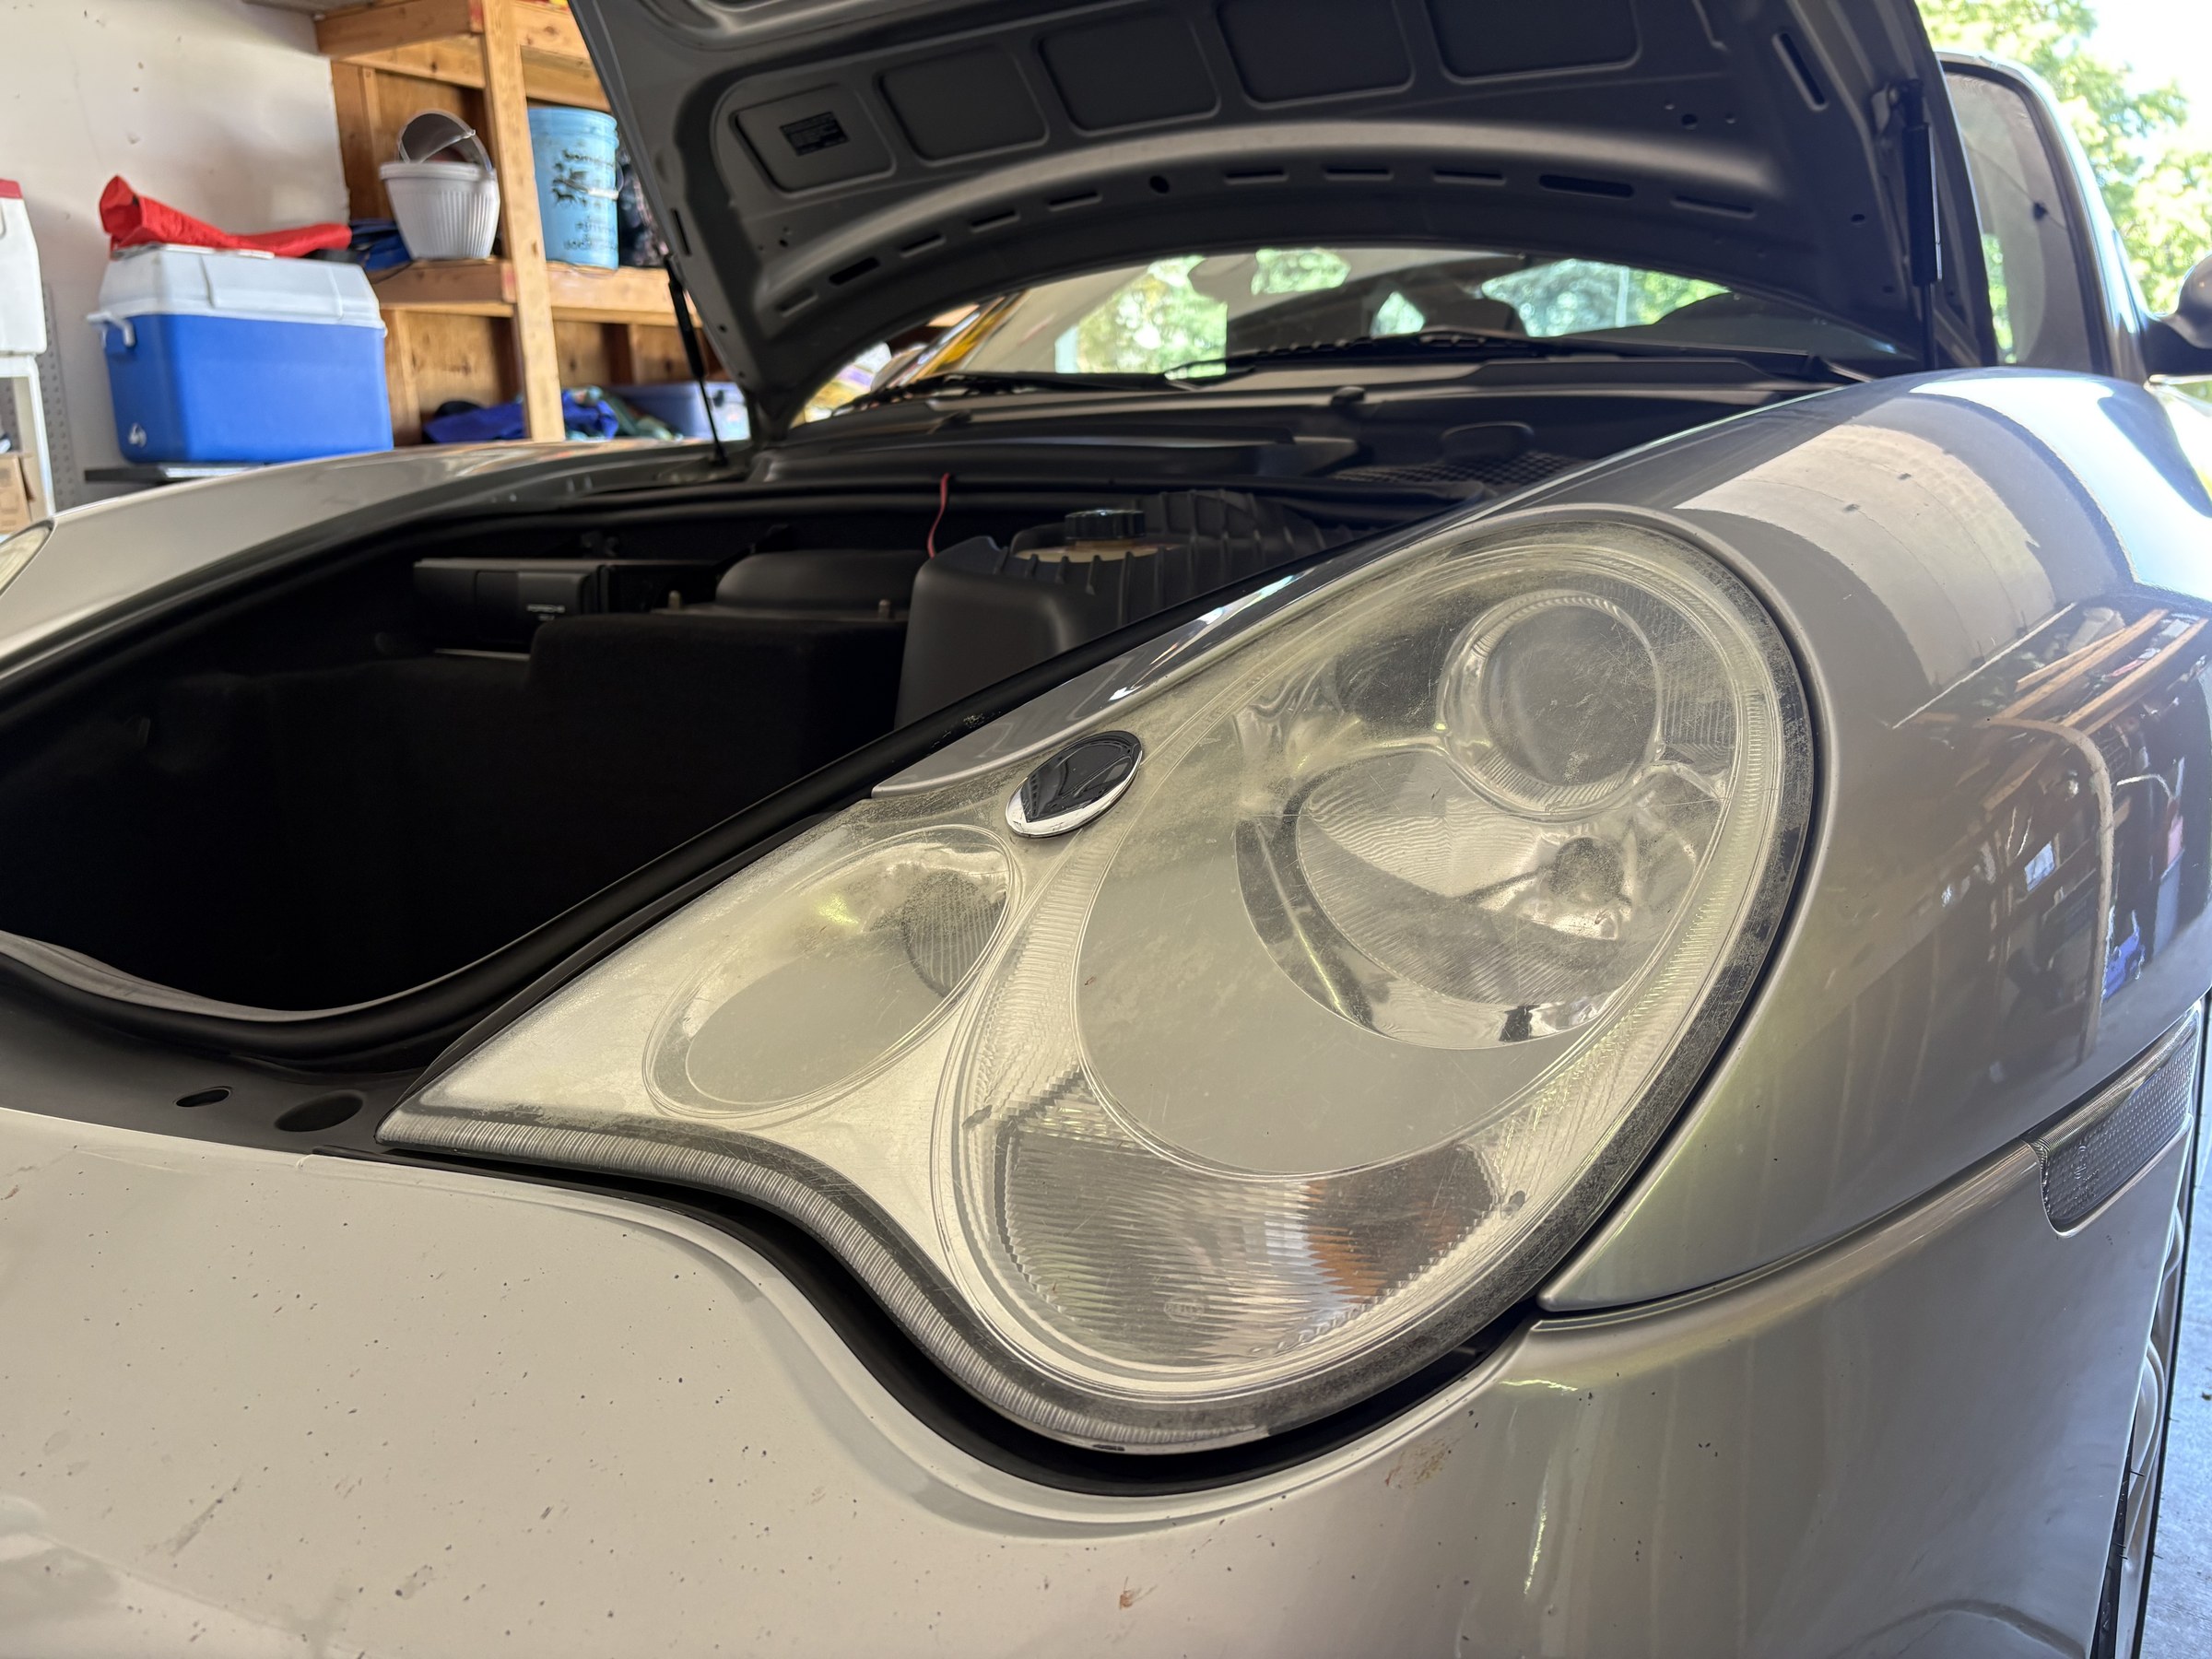
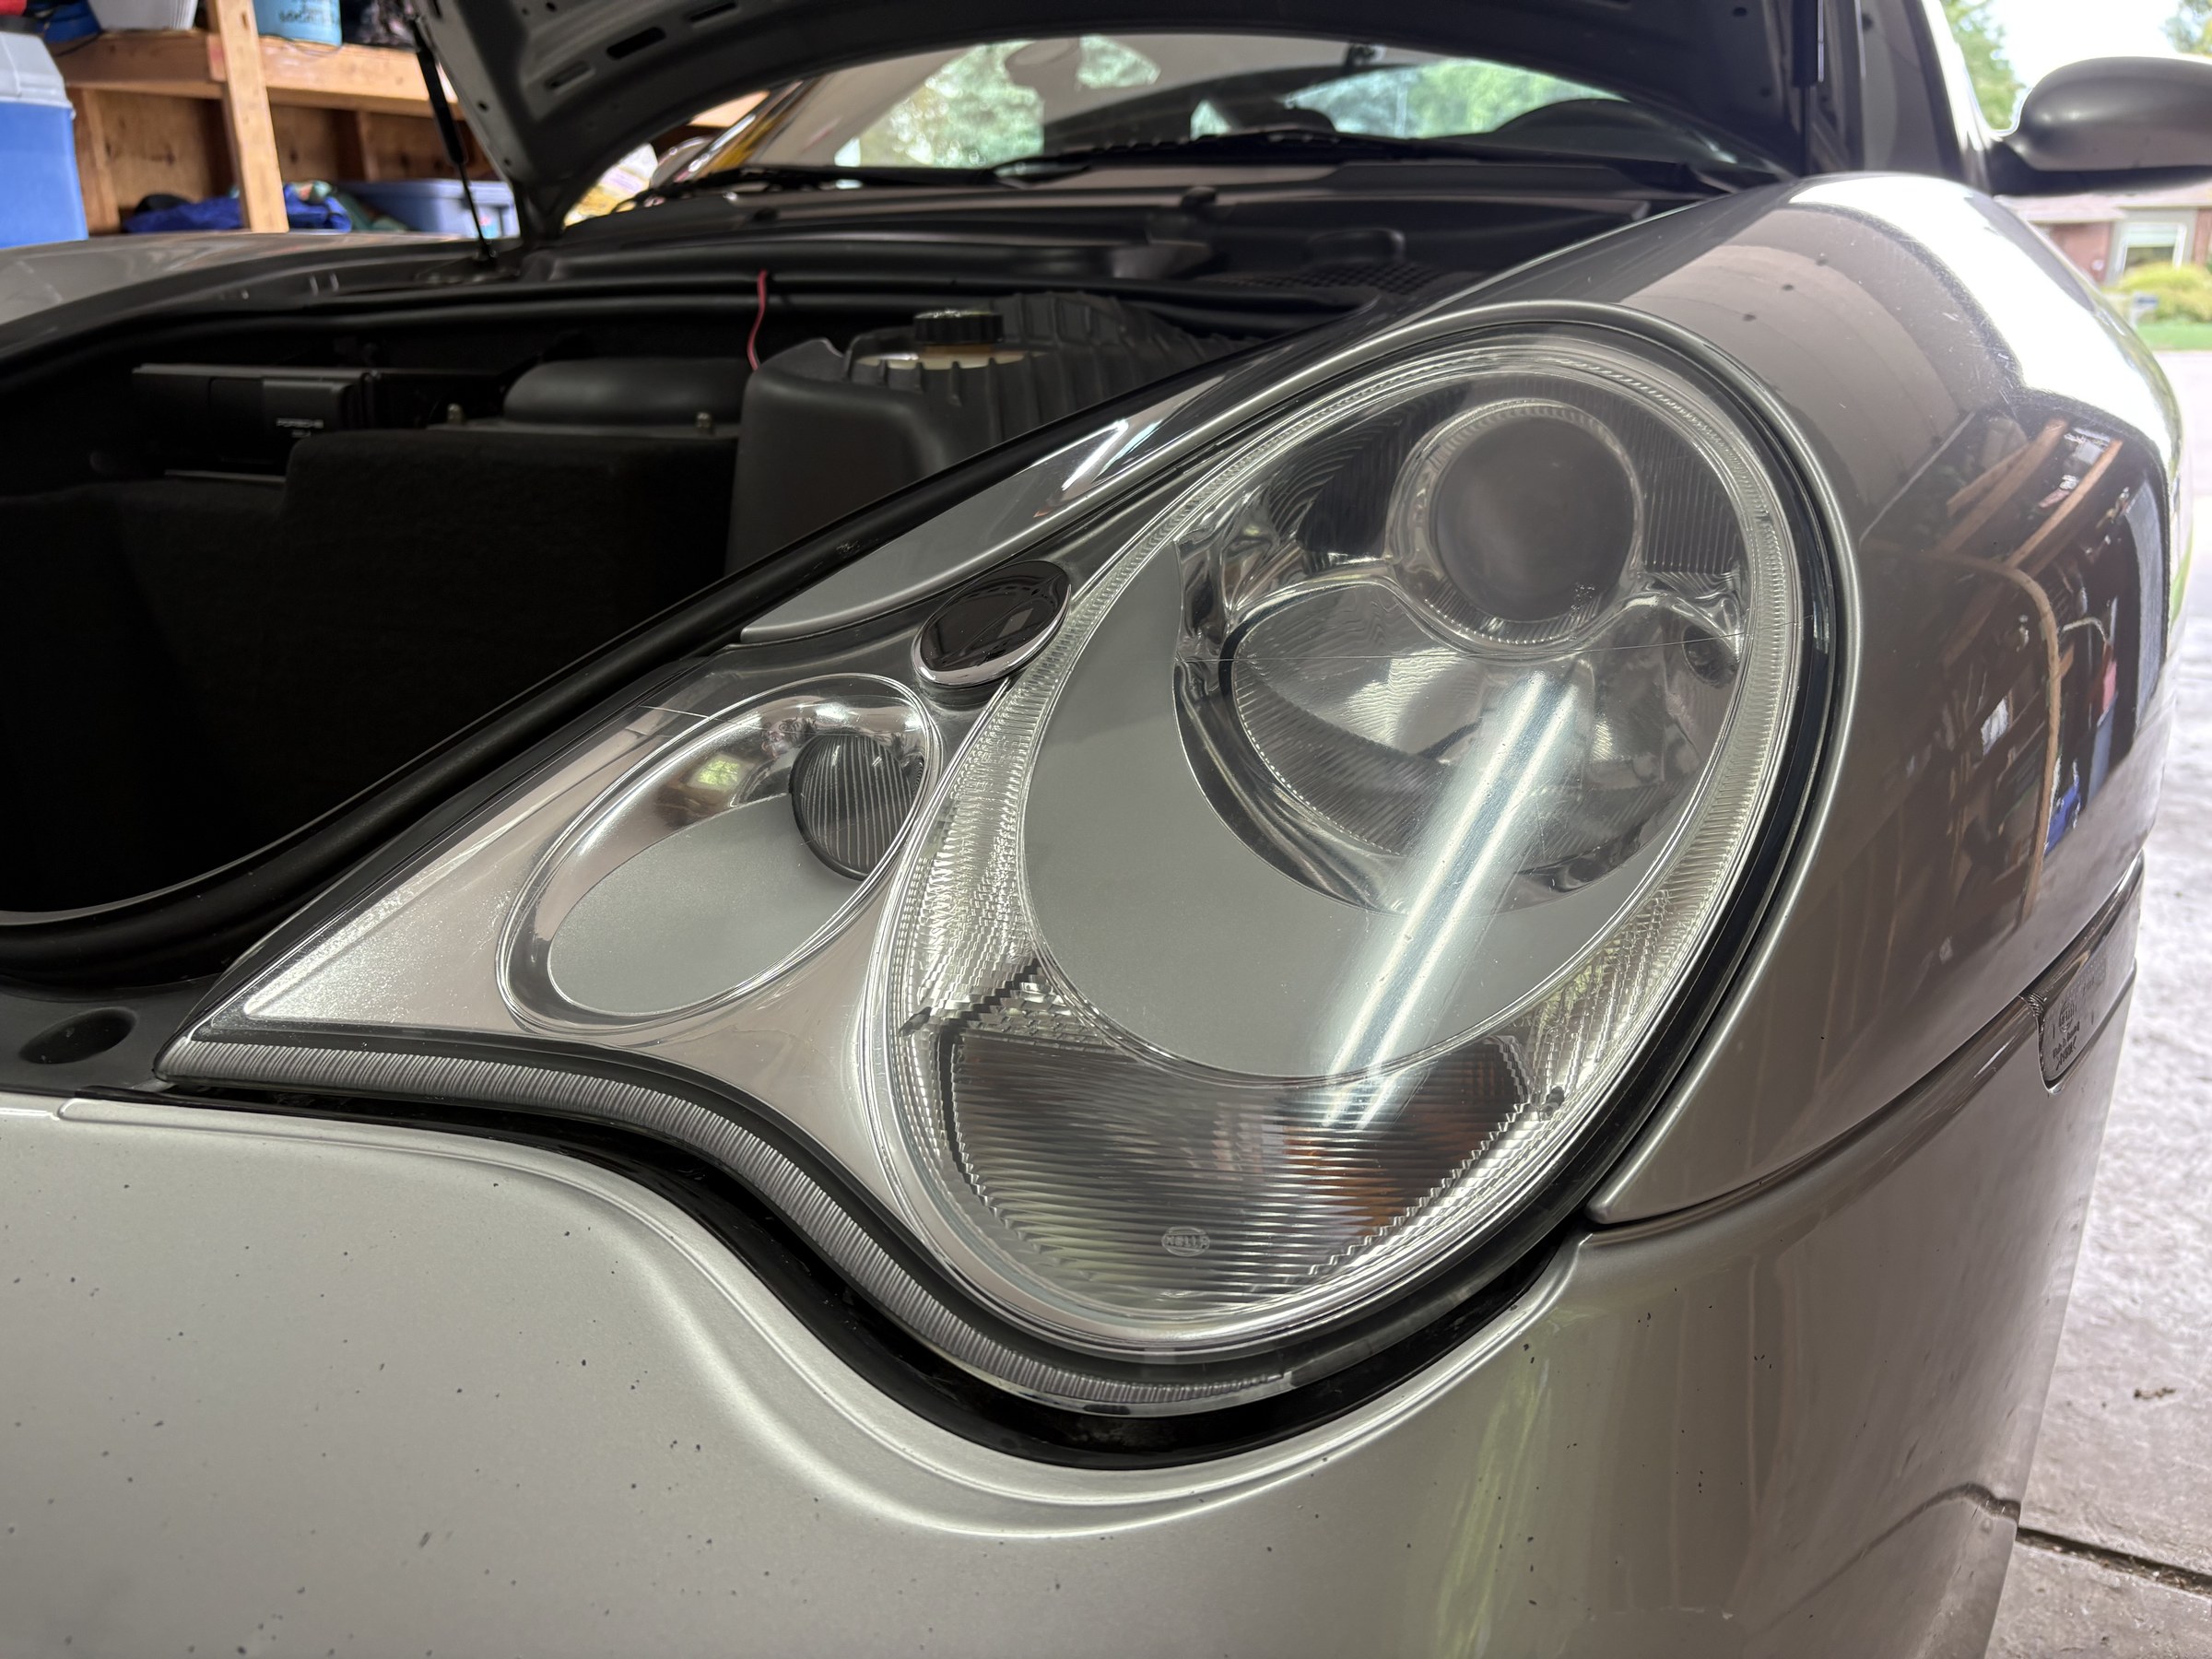
Brian’s genuine before-and-after job photos, not stock photos or AI-generated results. Camera position and lighting differ; this is a real-job record rather than a controlled comparison or a measured light-output test.